
Isobel usually has white-blonde hair ‘fading’ to dark blue at the ends.
(She now has peachy-red hair ‘fading’ to same.)
Isobel likes EasyWay iced tea and chocolate-covered sunflower seeds.
(She also like dinosaurs.)
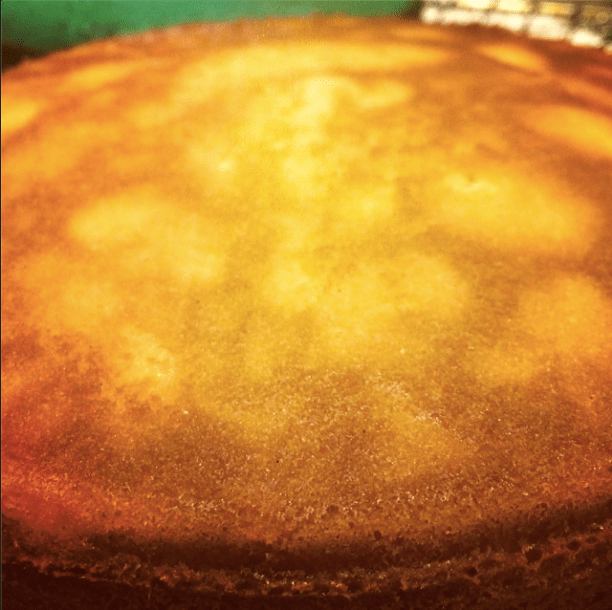
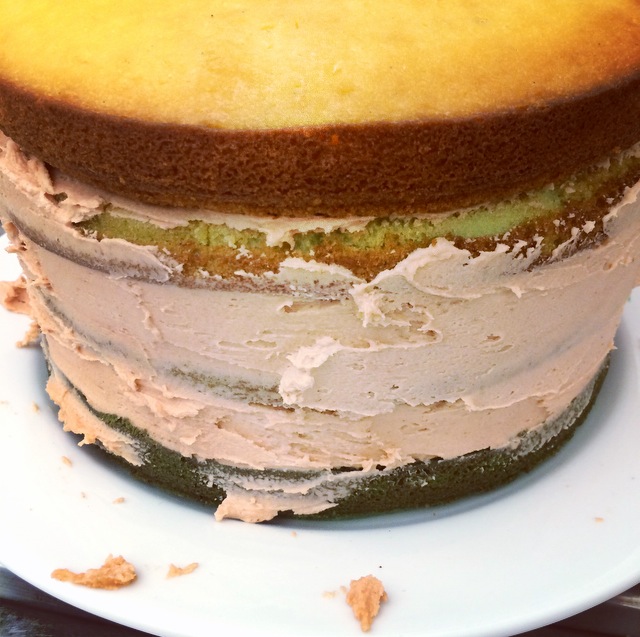
This is Isobel’s cake.

The following recipe makes four layers of dense, sweet, white chocolate mud
encased in sherbet-like peach frosting.
The cake: I doubled the recipe for Emily Loves Food’s White Chocolate Mud Cake to get four 22″ layers, which was Bess the KitchenAid Mixer’s maximum capacity. You could easily make 2/3 of the recipe below and have four thinner layers (or halve it and make three layers).
The frosting: I worked with the frosting part of The Cake Merchant’s Pink Almond Party Cake recipe and got just the right amount (which is a miracle! I always have half a litre left over). If you decide to make less cake, you’ll just have a bit of frosting left over. (Gosh, what a pity.)
Gather:
For the cake
1 + 1/3 cups self-raising flour
2 cups plain flour
600 g white chocolate
400 g butter
1 + 1/2 cups caster sugar
2 cups milk
1/2 tsp salt
2 tsp vanilla
4 eggs
Blue food colouring
For the frosting
280 g butter (room temp.)
3 cups icing mixture
1/2 tsp vanilla
3 sachets instant peach iced tea
1 drop red food colouring
2 drops yellow food colouring
Then:
- Preheat the oven to 160° C and make sure you have two evenly spaced racks in there — not too close to the top or bottom.
- Grab two 22″ springform cake tins — butter the bottom and sides, and line the bottom with baking paper. Cut two extra circles of baking paper (for layers 3 and 4) while you’re at it (or have four tins, of course). Set all this aside.
- Grab a medium bowl and sift the two flours together. Set aside.
… - Roughly chop the white chocolate and butter, and place in a large saucepan with the caster sugar, milk and salt. Heat over a medium heat, stirring constantly, until the chocolate has melted and the mixture is velvety smooth. Set aside for about 15 minutes.
- In the bowl of your stand mixer (or a large mixing bowl with very sturdy hand mixers), whisk the eggs and vanilla together for a minute or so.
- Still mixing, very slowly start to pour in the melted white chocolate mixture until fully combined.
- Slowly start adding in the flour until it’s all incorporated and there are no pockets of flour or chocolate mixture.
- Grab four smallish mixing bowls, and divide out the batter. I don’t bother with scales — just ladle a big scoop of batter into each bowl, one at a time, until there’s an equal amount in each bowl.
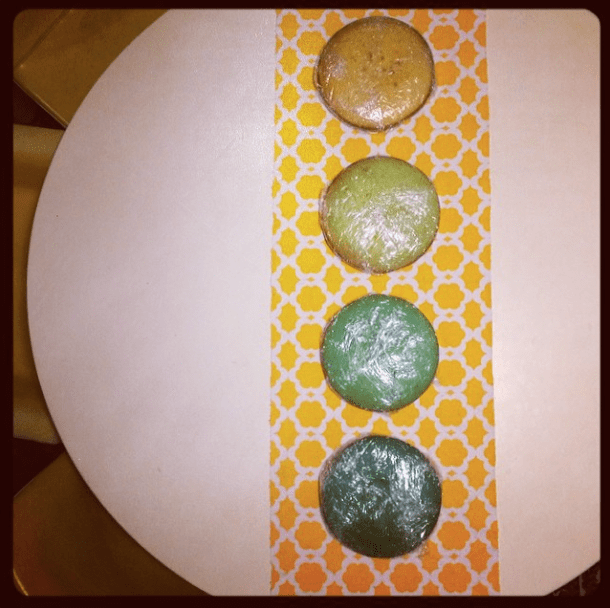
- Start with the bluest layer of your ombré: grab one bowl of batter and add anywhere up to 10 drops of blue food colouring — then mix thoroughly until he dye is evenly mixed in. Add more if you want an even brighter colour.
- Transfer the blue batter into one of the prepared cake tins, clean your spatula, then pour an uncoloured bowl of batter into the other prepared tin — this is your ‘white’ layer.
- Bake both cakes for about 30–40 minutes, or until a bamboo skewer inserted into the middle comes out clean.*
- While the first two cakes are baking, prepare the two middle layers of blue batter. Grab one of the bowls of batter and add HALF the amount of blue food colouring you added for the bluest layer. Then grab the last bowl of batter, and add half as much blue again — probably just a few drops. Mix both well and set aside until the tins are ready to reuse.
… - Once the first two cakes are ready, remove them from the oven and leave them in the tins — on a cooling rack — for about 10 minutes. Then remove the sides of the tins, flip both cakes onto the cooling rack, and carefully remove the tin-bottoms.** Then set the cooked cakes right side up on the cooling rack.
- Re-assemble and re-prep the tins.
- Transfer the remaining two batches of butter to the re-prepped springform tins, then bake/prepare for cooling as before.
- Once the cakes have cooled completely, you can wrap them individually in cling wrap and keep them at room temperature until you’re ready to assemble the cake (up to two days later).
… - For the frosting***
Make sure the butter is nice and soft — microwave it for a few seconds if it’s very cold. Sift the icing mixture and set aside. - In the bowl of your stand mixer (or with hand mixers as above) whip the butter on a high speed for about 3 minutes.
- Slow down the mixer and slowly add the sifted icing mixture until it’s fully incorporated.
- Add the peach iced tea powder and the red and yellow food colouring, and mix on a high speed until it’s all evenly distributed (and peach-coloured).
… - To assemble
Put the bluest cake top-side down on a large plate.**** Spread some of the frosting on the exposed flat surface — just enough to create a smooth layer (about 5mm). - Next, place the second-bluest cake flat/bottom side down on the flat layer of frosting, and top with another layer of smoothed-out frosting.
- Repeat — top side facing down for the third layer, then top side up for the last/top layer — until you have all four layers in place.
- Use frosting to fill in any gaps around the sides where the layers don’t sit completely flush.

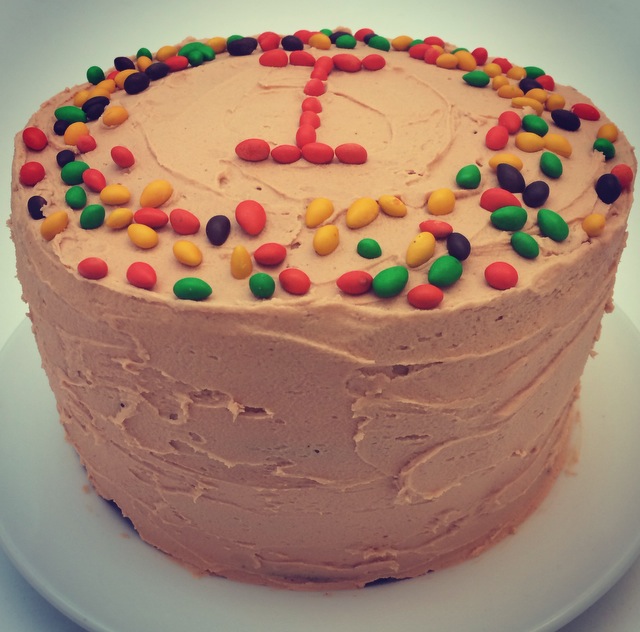
… - Use the remaining frosting to cover the entire cake.

(Don’t worry if it’s a bit lopsided.)
… - Decorate the top with pretty pearly sugar beads… or candy-and-chocolate-covered sunflower seeds, if your Isbobel like those as much as mine does.


Notes:
* (Don’t forget to test both cakes, and do keep an eye on them — I wasn’t really watching the clock and went mostly by the skewer test.)
**If the baking paper and butter worked as they should, you can carefully run a butter knife between the tin and the paper and just lift the bottom of the tin straight off.
***You can make the frosting ahead of time (the night before, for example) and keep it in an airtight container in the fridge. Just take it out and let it come to spreadable room temperature about 2 hours before you’re ready to assemble and/or serve the cake.
****If it’s really too dome-shaped, you can slice the top off to make it flat.
